Hey there! Want to automate your workflows and build awesome projects with Jenkins? You’re in the right place! In this guide, we’ll install Jenkins, set it up, and get you ready to conquer the CI/CD world—all while having a bit of fun. 🎉
Prerequisites
Before we dive into Jenkins, we need to ensure we have:
- Java 11 JDK (Jenkins’ trusty companion)
- A system running Ubuntu or Debian (or a derivative)
- A cup of coffee (optional, but highly recommended)
Step 1: Install Java 11 JDK
Jenkins requires Java to run, so let’s make sure it’s installed and ready to go.
Run these commands to install Java 11:
sudo apt update
sudo apt install -y openjdk-11-jdk
To verify Java is installed:
java -versionYou should see something like:

Congrats, Java is ready! 🎉
Step 2: Add Jenkins Repository
Here’s where the fun begins. Let’s get Jenkins!
I encountered an issue here, I’ll help you out here :
If you initially tried adding the repository using:
curl -fsSL https://pkg.jenkins.io/debian-stable/jenkins.io.key | sudo tee /usr/share/keyrings/jenkins-keyring.asc > /dev/null

echo deb [signed-by=/usr/share/keyrings/jenkins-keyring.asc] https://pkg.jenkins.io/debian-stable binary/ | sudo tee /etc/apt/sources.list.d/jenkins.list > /dev/null
I had an issue where it failed when I tried apt update :

If this doesn’t work, then use these new Linux Repository Signing Keys :
For Debian/Ubuntu LTS (Long-Term Support) Release:
curl -fsSL https://pkg.jenkins.io/debian-stable/jenkins.io-2023.key | sudo tee \
  /usr/share/keyrings/jenkins-keyring.asc > /dev/null
echo deb [signed-by=/usr/share/keyrings/jenkins-keyring.asc] \
  https://pkg.jenkins.io/debian-stable binary/ | sudo tee \
  /etc/apt/sources.list.d/jenkins.list > /dev/null
For Debian/Ubuntu Weekly Release:
curl -fsSL https://pkg.jenkins.io/debian-stable/jenkins.io-2023.key | sudo tee \
  /usr/share/keyrings/jenkins-keyring.asc > /dev/null
echo deb [signed-by=/usr/share/keyrings/jenkins-keyring.asc] \
  https://pkg.jenkins.io/debian-stable binary/ | sudo tee \
  /etc/apt/sources.list.d/jenkins.list > /dev/null
Step 3: Install Jenkins
Update your package index and install Jenkins:
sudo apt update
sudo apt install -y jenkins
Jenkins is now installed! 🎉 Let’s move on to setting it up.
Step 4: Start Jenkins Service
Start Jenkins and enable it to run on boot:
sudo systemctl start jenkins
sudo systemctl enable jenkins
Check if Jenkins is running:
systemctl status jenkins
If everything is green and running, you’re doing great! 🚀
Step 5: Access Jenkins
Now, let’s visit Jenkins in your browser:
Open http://your-server-ip:8080 in your favourite browser. (Replace your-server-ip with your system’s IP address.)
You should see the Jenkins unlock page:
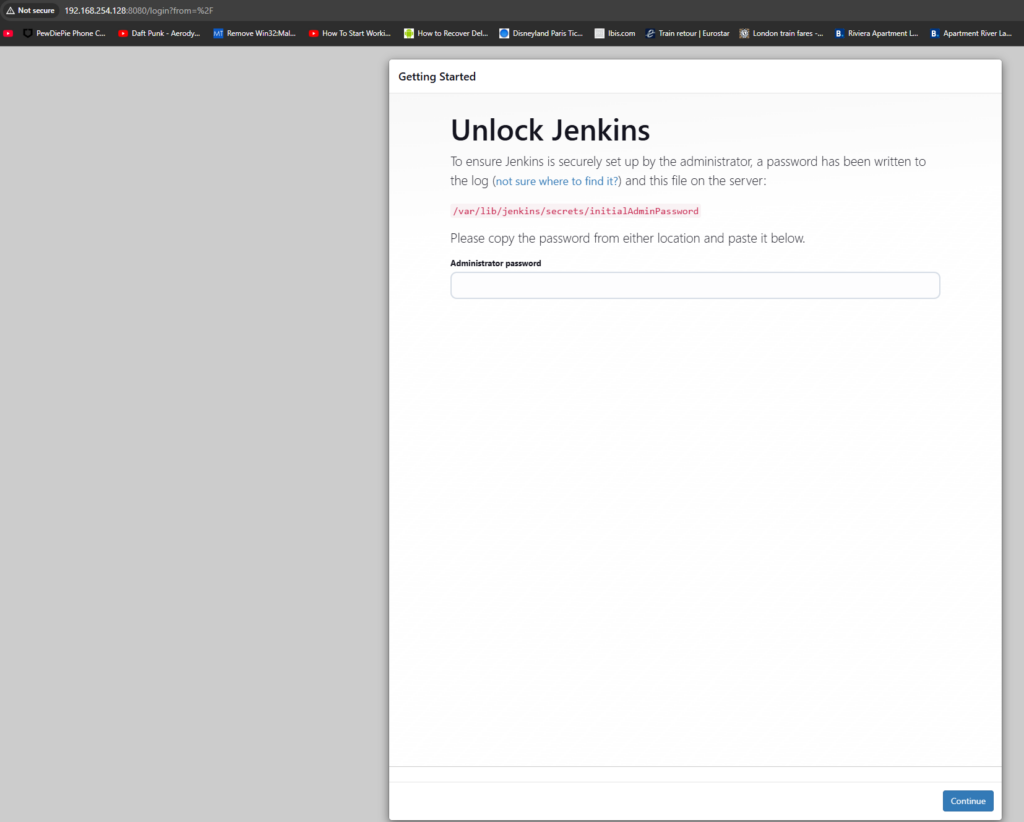
Step 6: Unlock Jenkins
- On your terminal, get the initial admin password:
cat /var/lib/jenkins/secrets/initialAdminPassword - Copy and paste the password into the Jenkins setup page.
- Click Continue and you will see something like this:
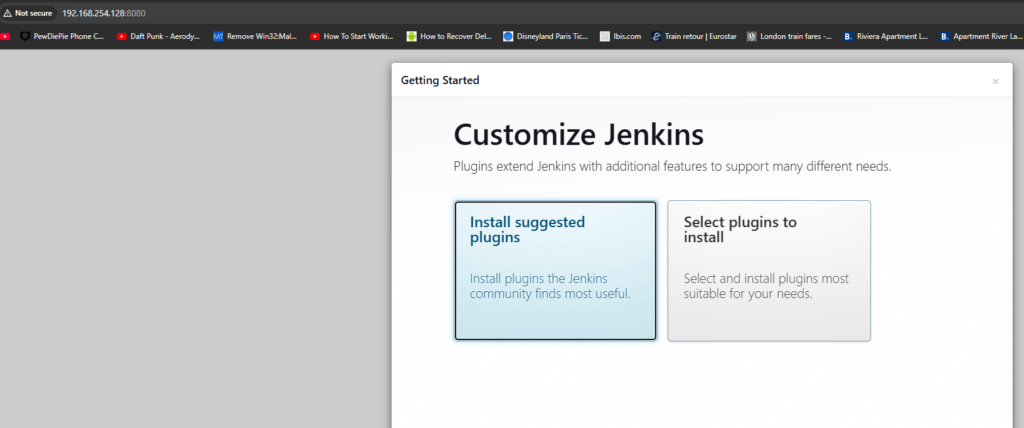
Step 7: Install Plugins
Jenkins will ask you to install plugins. For starters, click Install suggested plugins. Jenkins will handle the rest. 🛠️
It will take some time to install, so just wait a bit.
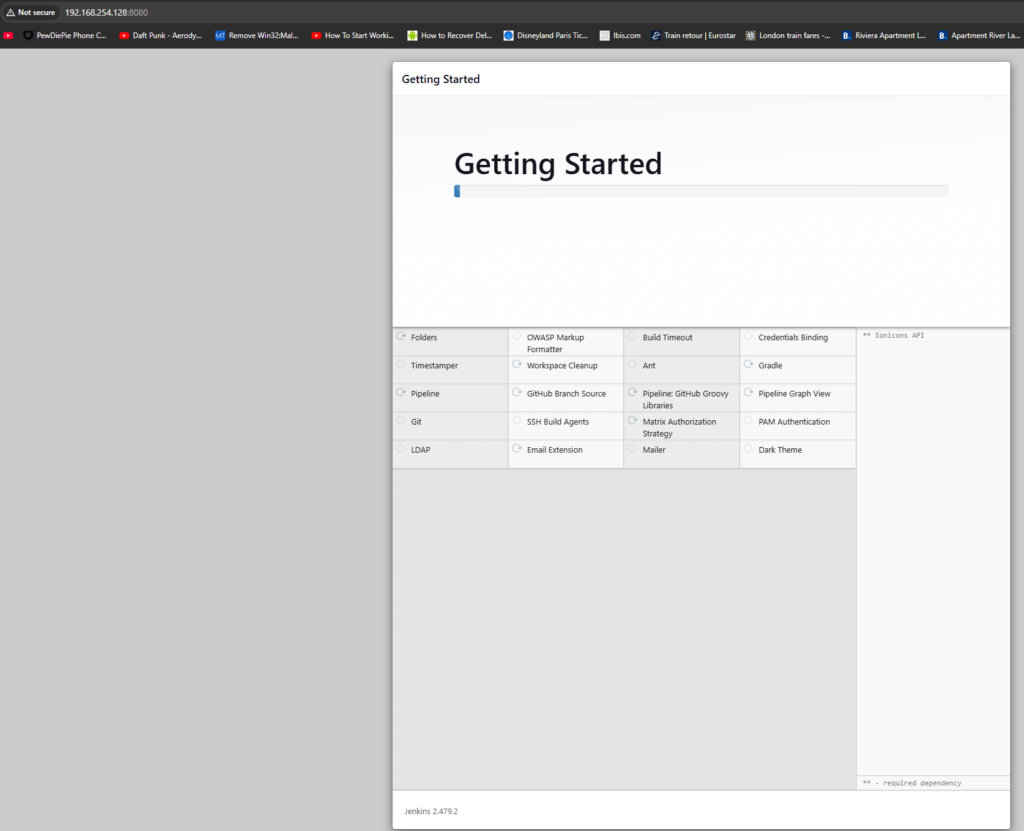
Step 8: Create Your First Admin User
Once the plugins are installed, you’ll be prompted to create an admin user. Fill in the details and click Save and Finish.
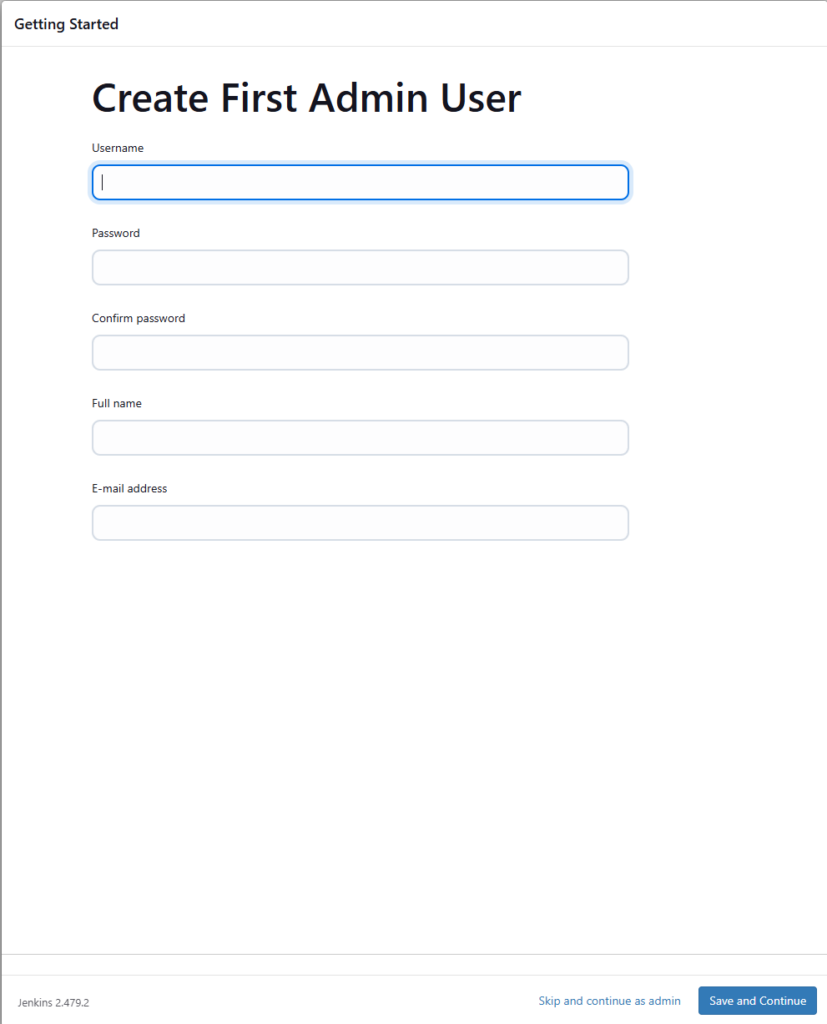
After completing the form, you will see this Getting Started page:

Just accept this and it’s done:

Step 9: Your Jenkins is Ready!
You’ll see the Jenkins dashboard:
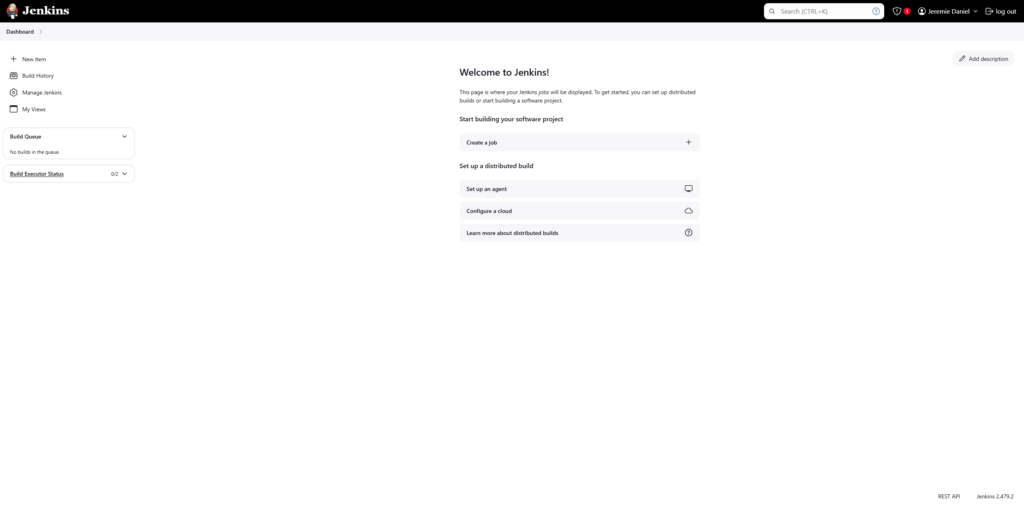
From here, you can start creating jobs, automating builds, and having a blast with Jenkins!
Bonus Tips
- Secure Jenkins: Enable HTTPS and set up a reverse proxy for better security.
- Backup Regularly: Use the Jenkins backup plugin to keep your data safe.
- Explore Plugins: Jenkins has a vast library of plugins to extend functionality.
Conclusion
You’ve installed Jenkins and are ready to automate everything! Whether you’re building pipelines or managing complex workflows, Jenkins has your back. 🚀
Got questions or tips to share? Drop them in the comments below. Happy automating! 😊
